"Will you be my" Cards
Knowing I had to get a move on asking my wedding party, I started playing around with my scrap paper. I knew I wanted to DIY but I had tons of idea. Thankfully, I let my creative juices flow and below is what I came up with. To the left was the inspiration! =o)
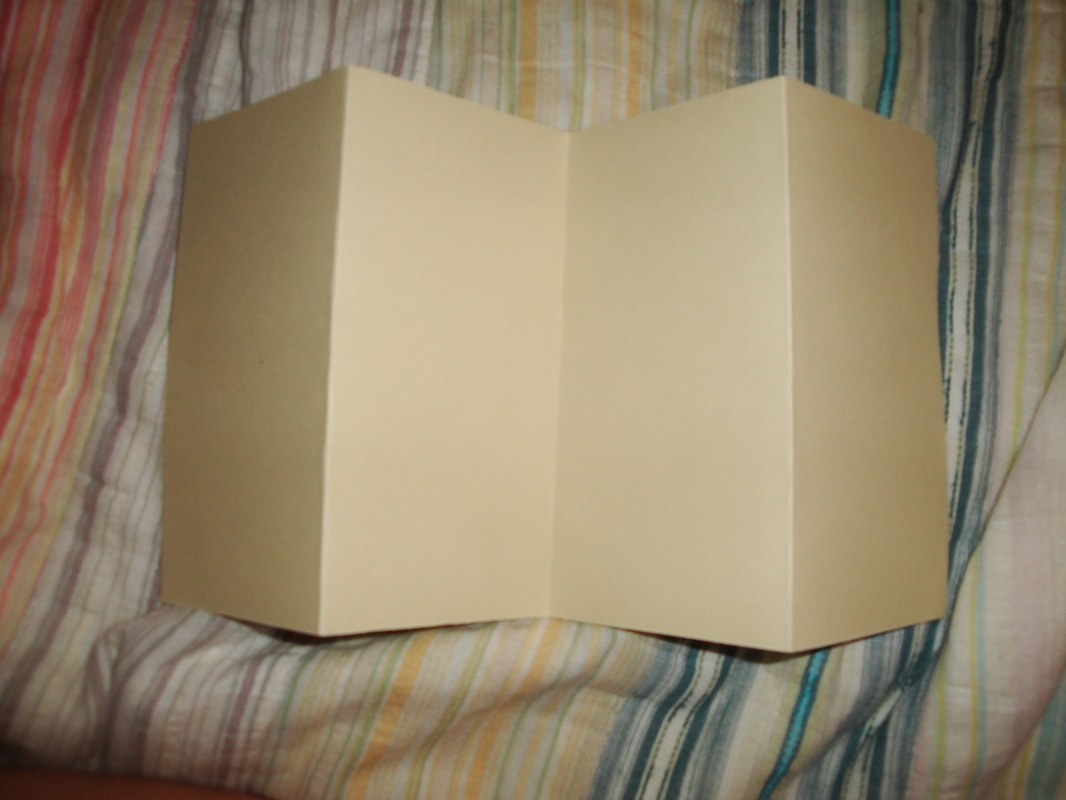
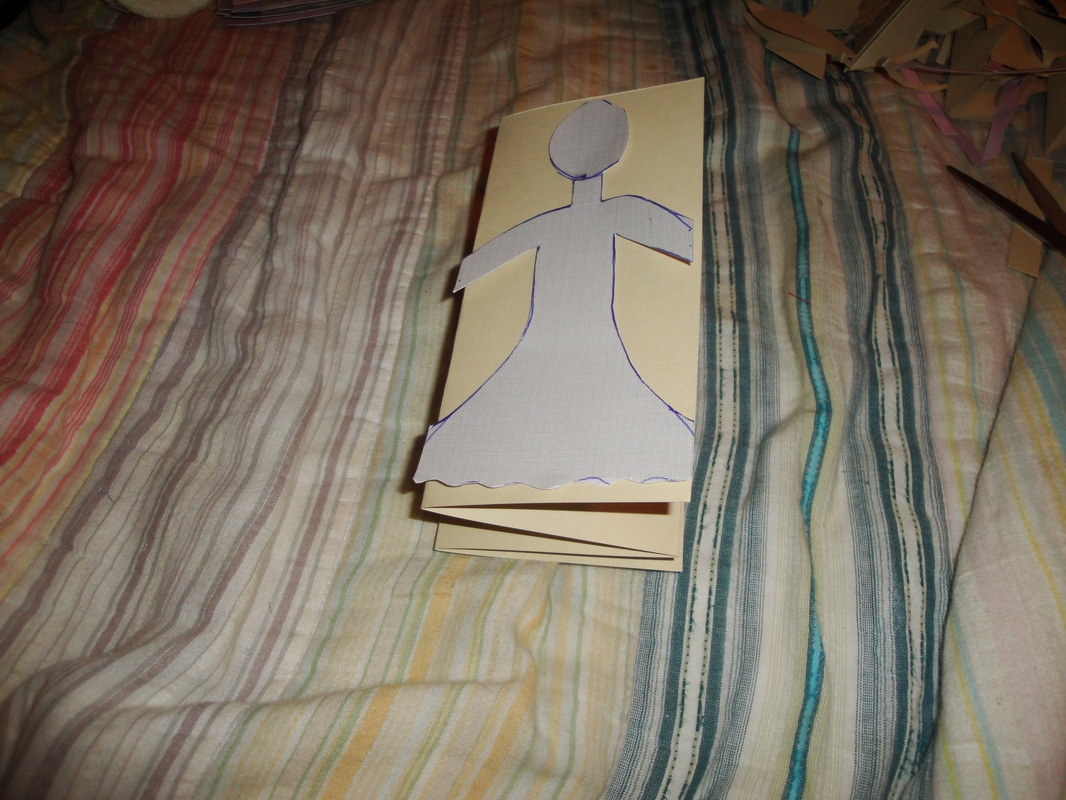
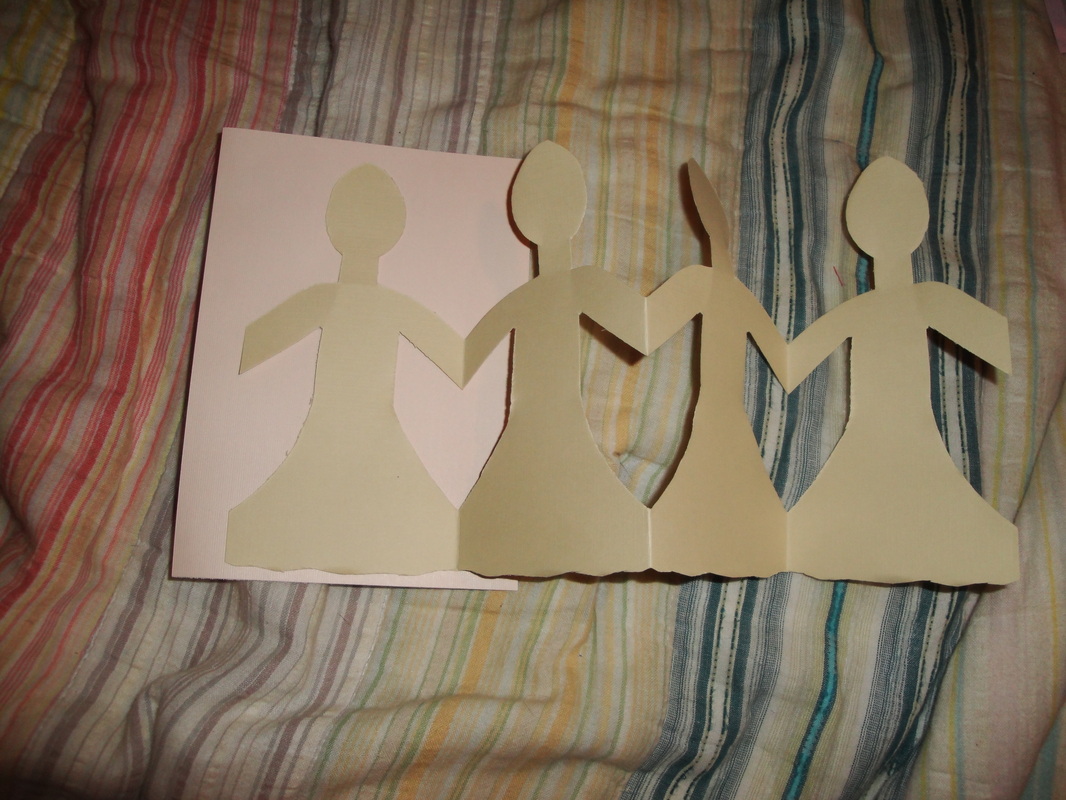
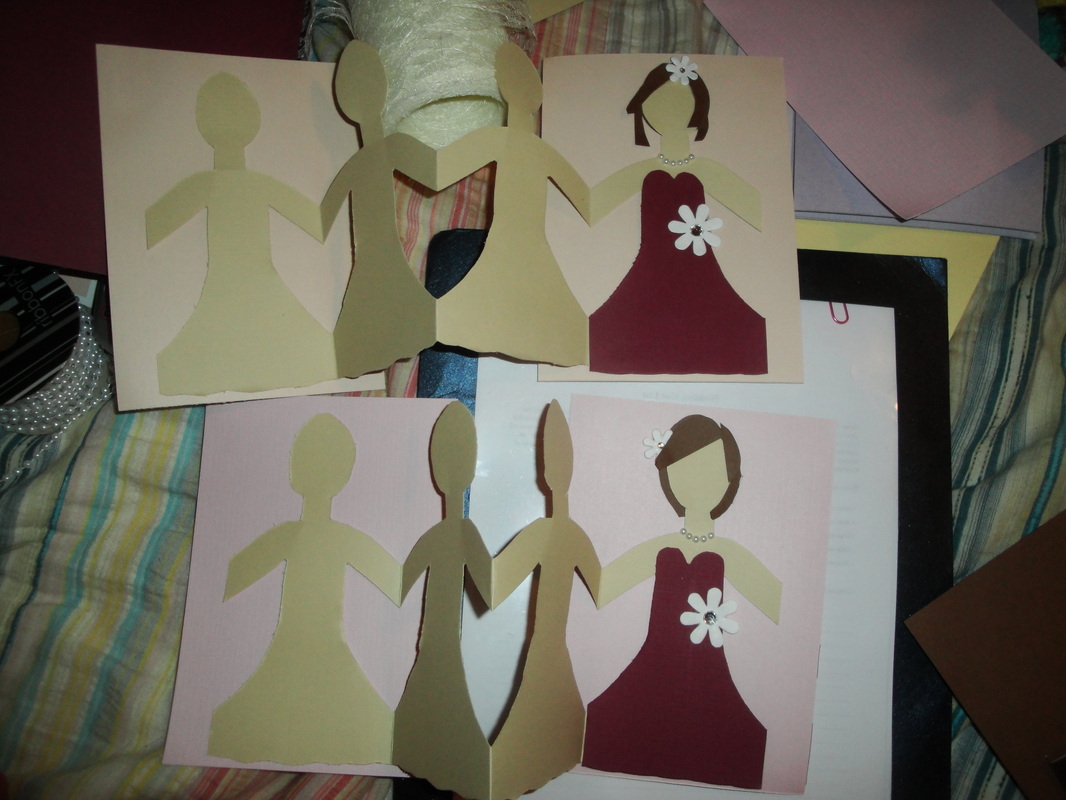
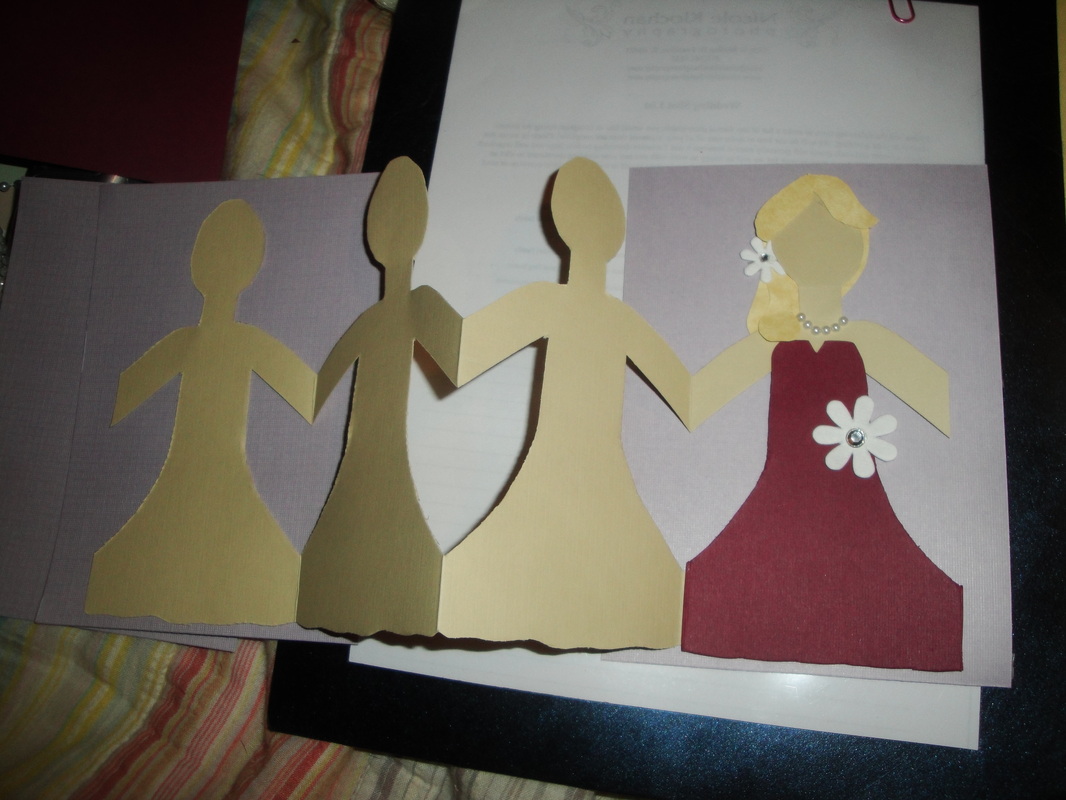
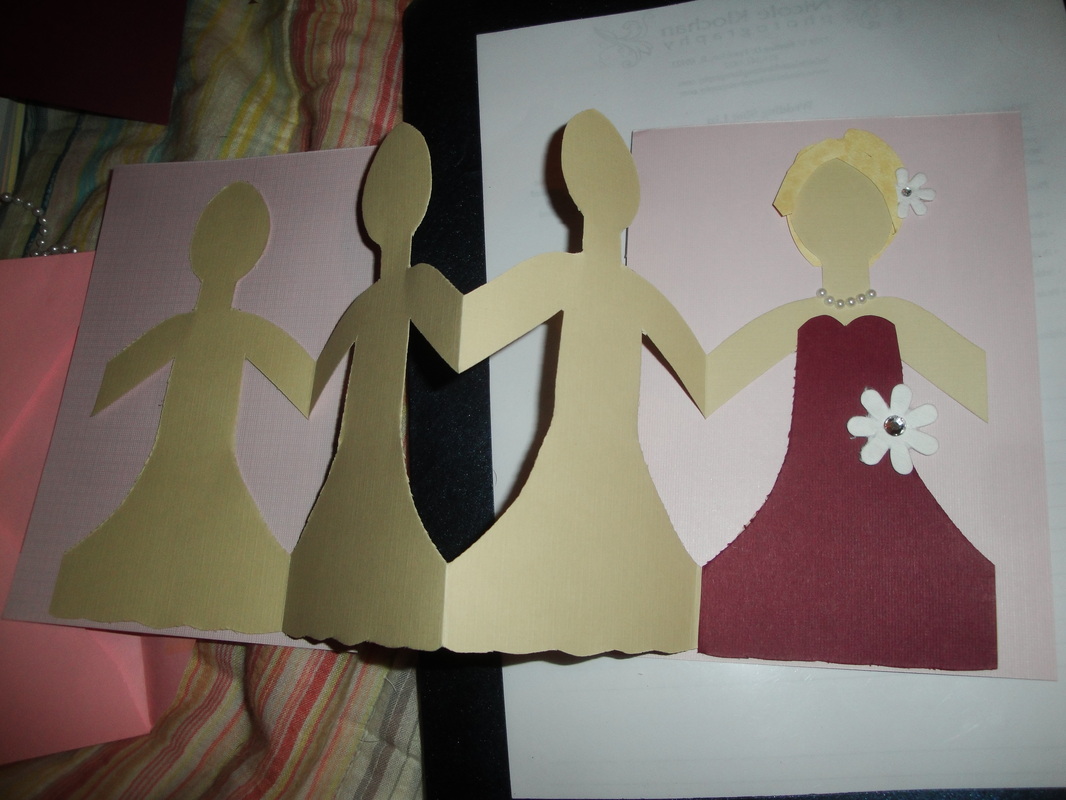
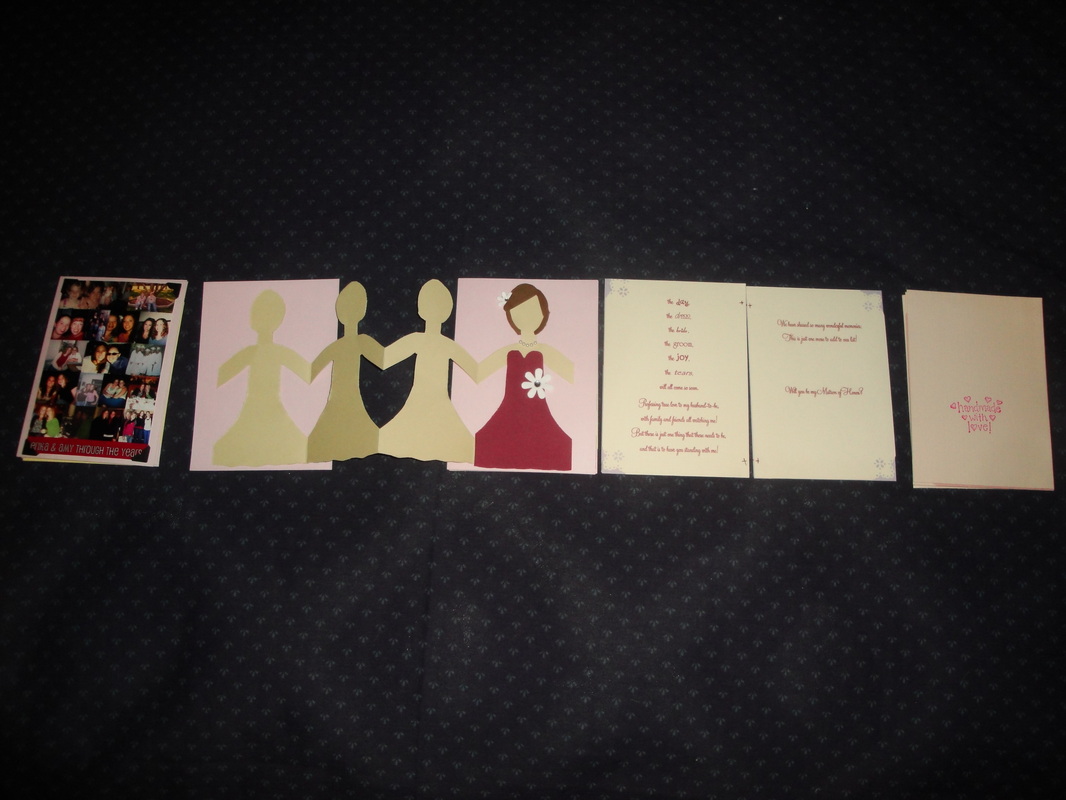
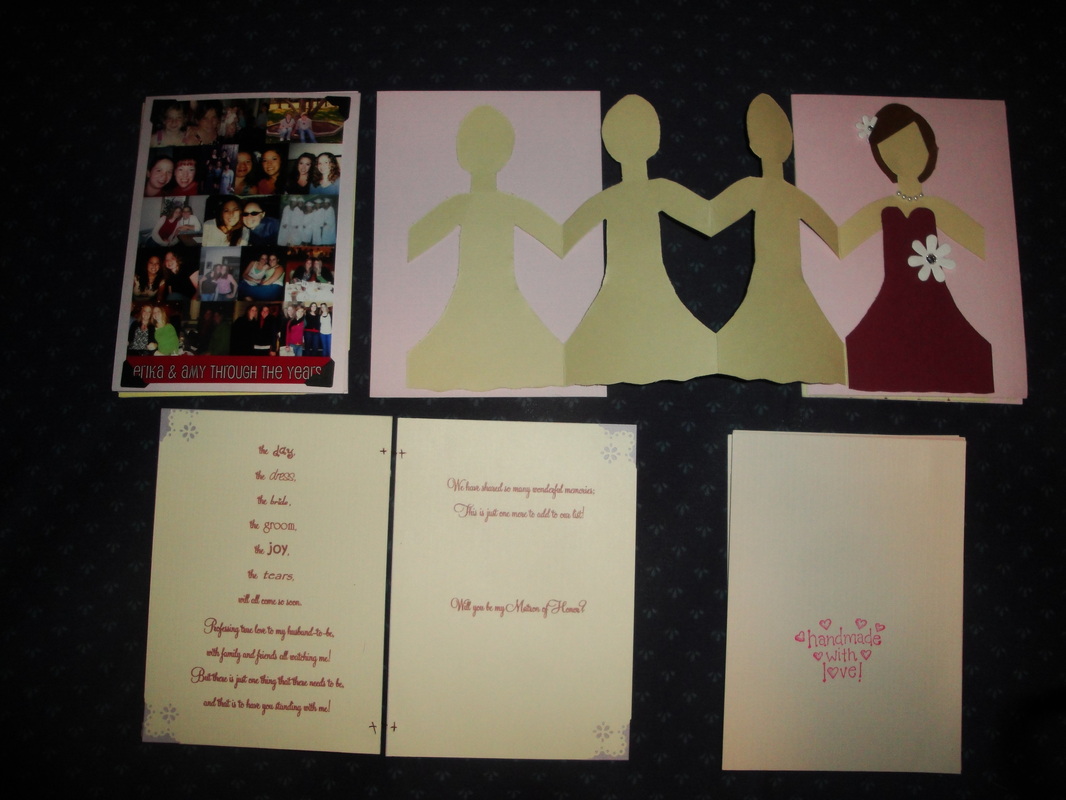
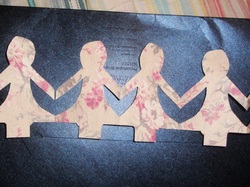
I had 4.25x6.75 cardstock in all different colors (left over from STD's) that I used. I'm not big on matchy match so I didn't care what color went with what. I did have to go buy tan paper (for the girls top part) and brown and yellow paper (for the girls hair - two brunettes and two blondes). I made a template, folded the 6x12 cardstock in half and then the two halves in half to made four sections, and then cut around the template to made four girls holding hands. (Picture # 1, 2, & 3)
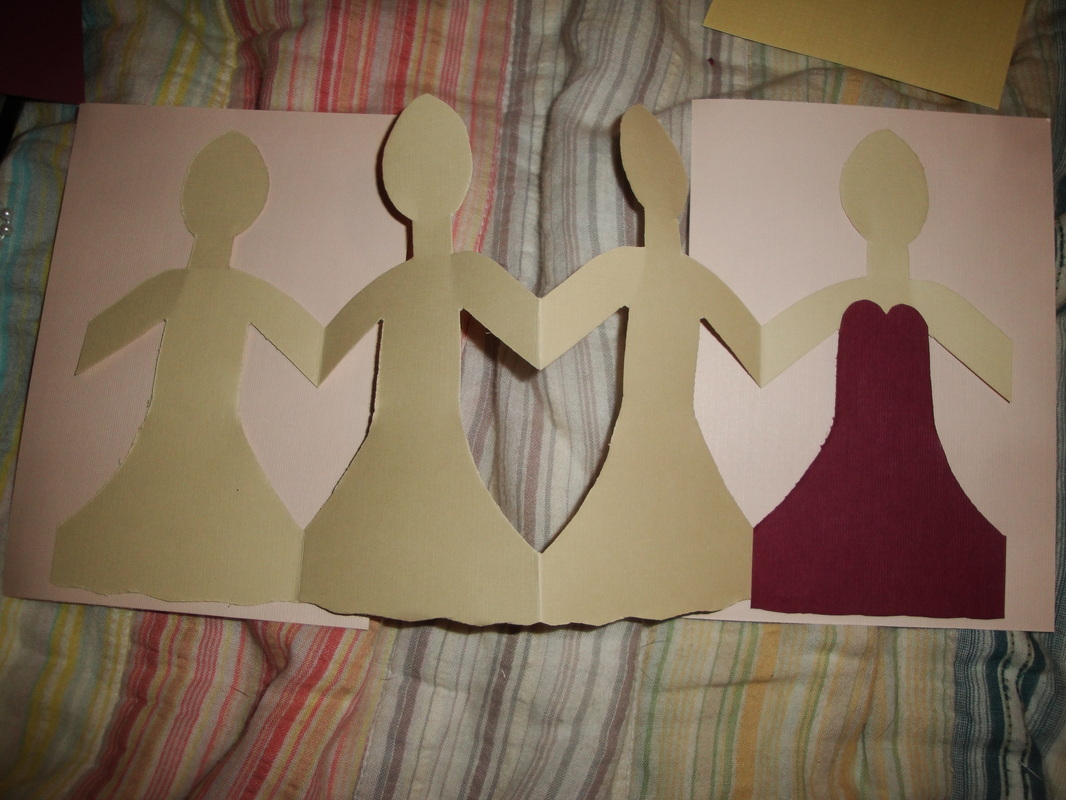
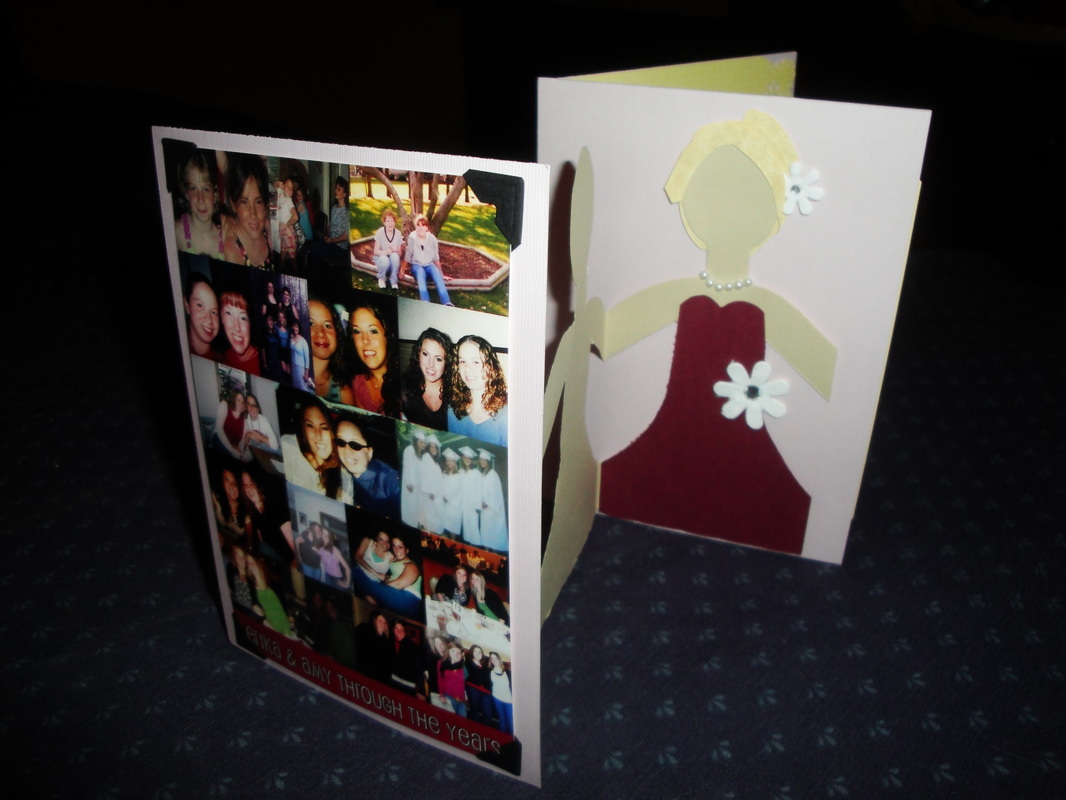
Next, I did the same thing for the maroon dresses, using the template for the girls but only going up to the neck. Made a cute sweetheart neckline and taped the dress to the girl. (Picture # 4) I decorated each girl with their own hair style, added pearls, and a flower to their dress and a flower in their hair. (Picture # 5, 6, & 7)
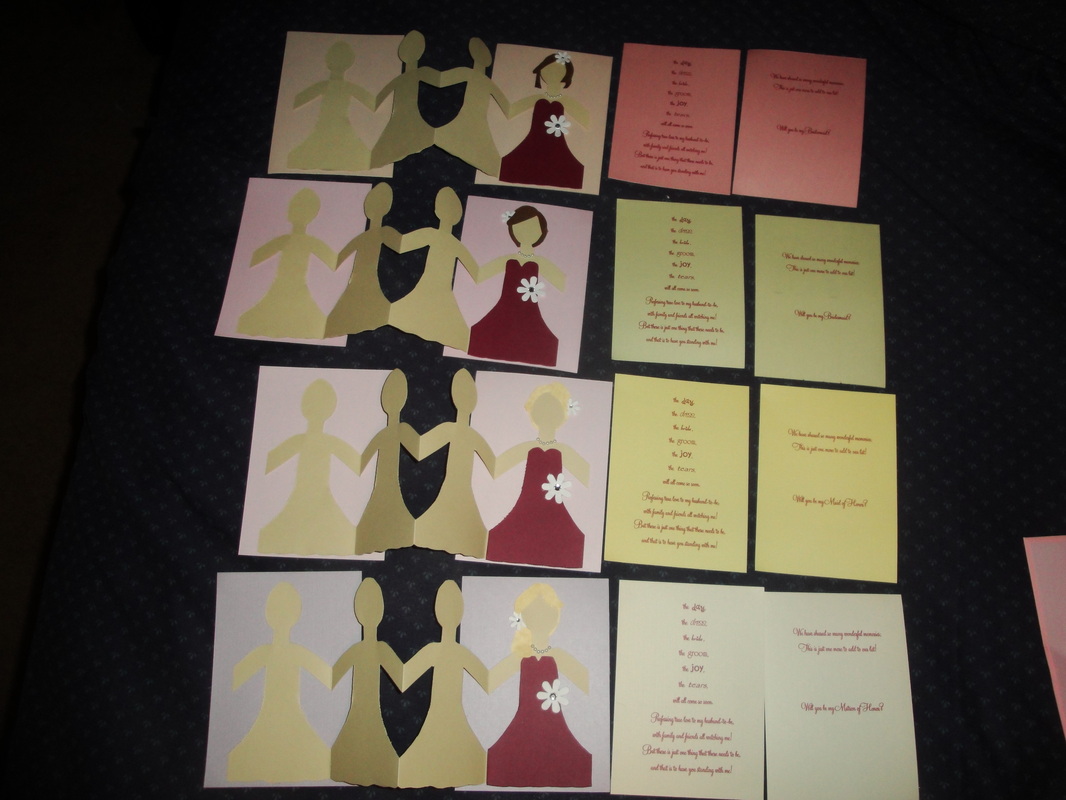
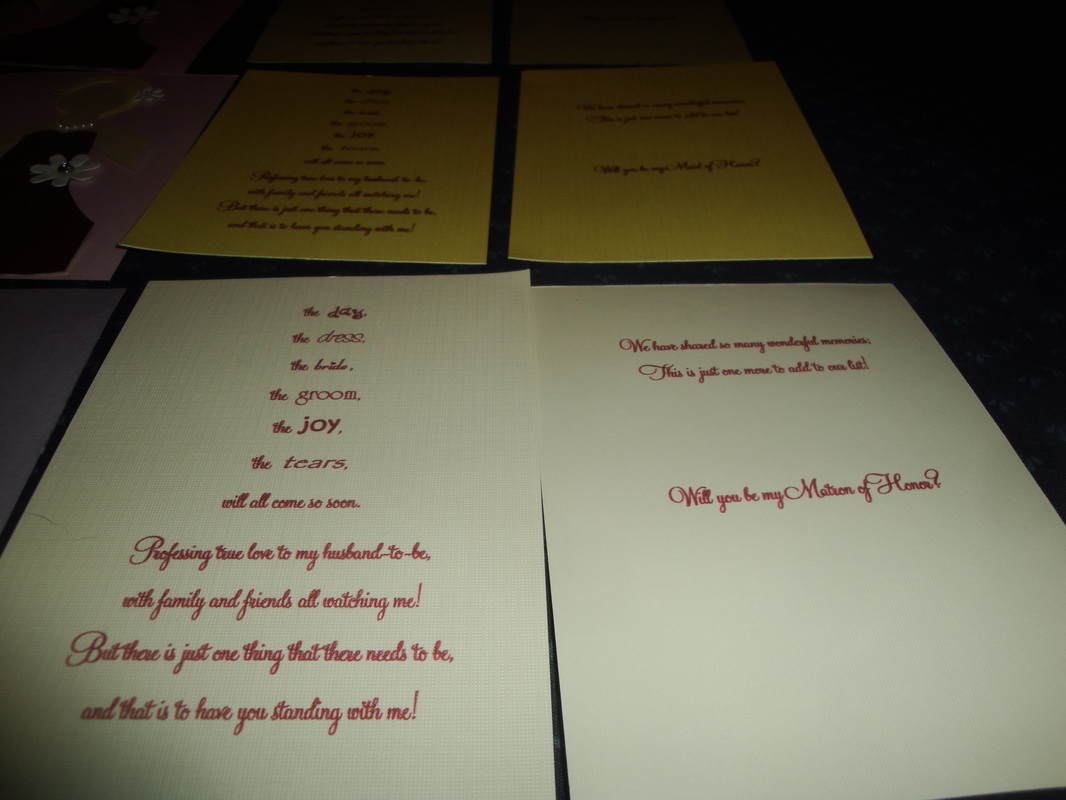
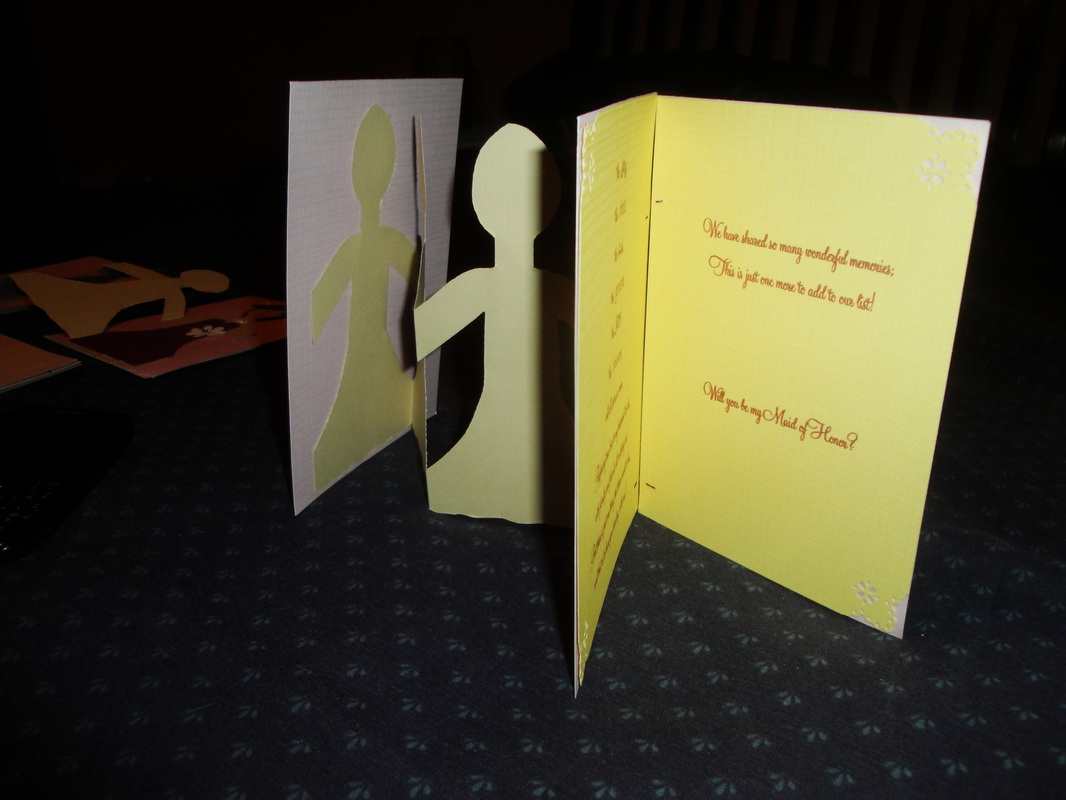
Next came the actually card. I wanted it to be short and sweet. I looked up Bridesmaid poems and used part of one with some of my own verbiage. It reads:
(left side) the day, the dress, the bride, the groom, the joy, the tears, will all come so soon.
Professing true love to my husband-to-be, with family and friends all watching me!
But there is just one thing that there needs to be, and that is to have you standing with me!
(right side) We have shared so many wonderful memories; This is just one more to add to our list!
Will you be my ... ? I made the outside corners pretty with a lace cut out and taped the cards together. (Picture # 8 & 9)
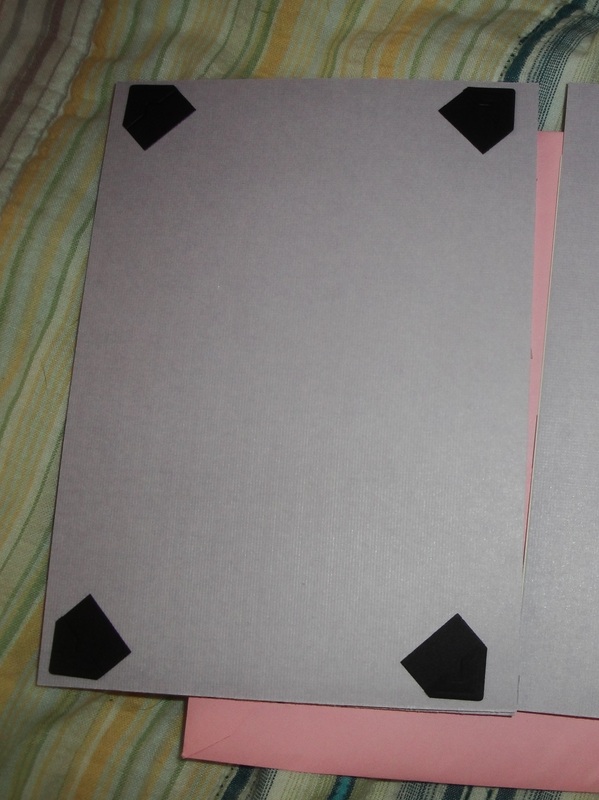
Next came the pictures. I'm a picture person so it's common that I made picture things when DIYing. For these, I made a picture collage of me and each girl from the time we met to present. I used PowerPoint, set the page to 12x18, and started adding pictures. Printing them from Walgreens (ready in a hour =o) ) and used corner holders to keep them in place. The girls can take the picture off the card and put it in a frame if they want. (Picture # 10)
Pictures # 11 & 12 are them all put together and how it will look when the girls open them from start to finish! Picture # 13 & 14 is how one looks on it's own. I'm so happy they are done! Oh, and I almost forgot. Handmade with Love stamped on the back! =o))
I had 4.25x6.75 cardstock in all different colors (left over from STD's) that I used. I'm not big on matchy match so I didn't care what color went with what. I did have to go buy tan paper (for the girls top part) and brown and yellow paper (for the girls hair - two brunettes and two blondes). I made a template, folded the 6x12 cardstock in half and then the two halves in half to made four sections, and then cut around the template to made four girls holding hands. (Picture # 1, 2, & 3)
Next, I did the same thing for the maroon dresses, using the template for the girls but only going up to the neck. Made a cute sweetheart neckline and taped the dress to the girl. (Picture # 4) I decorated each girl with their own hair style, added pearls, and a flower to their dress and a flower in their hair. (Picture # 5, 6, & 7)
Next came the actually card. I wanted it to be short and sweet. I looked up Bridesmaid poems and used part of one with some of my own verbiage. It reads:
(left side) the day, the dress, the bride, the groom, the joy, the tears, will all come so soon.
Professing true love to my husband-to-be, with family and friends all watching me!
But there is just one thing that there needs to be, and that is to have you standing with me!
(right side) We have shared so many wonderful memories; This is just one more to add to our list!
Will you be my ... ? I made the outside corners pretty with a lace cut out and taped the cards together. (Picture # 8 & 9)
Next came the pictures. I'm a picture person so it's common that I made picture things when DIYing. For these, I made a picture collage of me and each girl from the time we met to present. I used PowerPoint, set the page to 12x18, and started adding pictures. Printing them from Walgreens (ready in a hour =o) ) and used corner holders to keep them in place. The girls can take the picture off the card and put it in a frame if they want. (Picture # 10)
Pictures # 11 & 12 are them all put together and how it will look when the girls open them from start to finish! Picture # 13 & 14 is how one looks on it's own. I'm so happy they are done! Oh, and I almost forgot. Handmade with Love stamped on the back! =o))